How To Safely Relocate a Piano

How To Safely Relocate a Piano

Protect, disassemble, and move your piano with ease.

cross country movers

Pianos are commonly found in many households and businesses across the United States. They are also notoriously difficult pieces to move without incurring some sort of damage due to their size, weight, and fragile nature. They are also extremely expensive to repair, much less replace, so any time a piano needs to be relocated, it should be done only after the most judicious and detailed planning and preparation have been executed.

In this article we will look at the best standards and practices for moving several styles of piano. But first, as with any moving project, let us examine the preparation needed for such a job.

Measurements and Planning

  • You will need to map out your path of movement both in the current location and the subsequent destination. Move furniture and other items out of the path and remove any doors if extra room is needed.
  • Measure the piano as well as the hallways, doors, and other entry or exit points. Make sure you have sufficient clearance at all times. This is not a problem you want to discover as you are moving the piano.
  • Lay down floor protection. A piano is very heavy and could leave marks or scuffs on hardwood flooring.
  • Use a ramp for any stairs or steps that may be involved in the move.
  • Secure assistance. It may take up to four men to securely and safely maneuver a piano.
  • Due to the weight of the piano, always wear closed-toed shoes, gloves and back belts.
Two men preparing a grand piano for relocation in a well-lit room with moving boxes.

Your Moving Supplies

Have all of your supplies on hand before beginning the move. Again, you do not want to halt the process because you do not have what you need. And what you will need to do this safely are:

  • Moving blankets
  • A dolly or hand truck
  • Lifting straps
  • Tie down straps (ratchet variety)
  • Packing tape
  • Work gloves

Transporting an Upright Piano

Upright pianos are smaller and easier to maneuver than their grand or baby grand counterparts. You need to make sure the keys and pedals are well protected, and you should begin by placing the lid over the keyboard and securing it in place with packing tape. The pedals should be wrapped in stretch wrap and again secured with tape. Then wrap all sides of the piano with moving blankets to protect both the piano and your walls.

Upright pianos weigh between 6090-1500 pounds, so use lifting straps to lift the piano and place it on your dolly, then roll to the moving truck and use ratchet straps to tie it down securely. It is advisable to load your piano in the truck first, as this helps balance the load and will help protect the piano from damage.

Transporting a Grand Piano

Grand pianos are a completely different proposition altogether, in that they have to be disassembled for transport, making them much more time-consuming than an upright piano. You will want to take detailed notes or pictures or video of the disassembly to assist you in reassembling the piano later on.

The first thing to do is to lower and secure the top lid and then begin to remove the piano legs and pedals. Store the legs and pedals in a box, clearly labeled for easy access later. Wrap the entire piano with moving blankets and secure with packing tape and do the same for the legs and pedals.

Make sure you have assistants on each side of the piano before attempting to move it. Using lifting straps, lift the piano simultaneously and place it on a pair of dollies. Grand pianos will likely require more than one dolly due to their size and shape. Roll the piano onto your moving truck and place it against the back wall, secured with tie down straps.

Can You Move a Piano On its Side?

Yes, as long as it is done carefully. In fact, turning it on its side may prove invaluable when navigating narrow doorways or turns in hallways. The piano should not be left on its side for very long; moving will often knock them slightly out of tune and leaving them on their side may exacerbate the problem. Stant the piano back upright as soon as you can.

Procedures for moving a piano on its side are roughly the same as listed above. Use plenty of moving blankets, have several folks to assist, and place the piano near the back of the moving truck.

Two movers carefully lifting a glossy black grand piano in a spacious, elegant interior.

Arriving at Your Destination

While transporting the piano, make plans to stop every so often and check on the unit, making sure it remains securely tied down and not at risk of any damage.

Once you have arrived at your new location, the piano will need to be moved into its new location and reassembled (if needed). Take your time, as pianos are heavy items and moving them between houses and through rooms can be somewhat cumbersome. If you have to go up or down steps, make use of a metal ramp. Do not be surprised if it does require at least some minimal tuning. It does not take much to knock a piano out of tune. If possible, wait several weeks before tuning to allow the piano time to “settle.”

Wipe the piano down with furniture cleaner to remove and dust or debris that may have accumulated.

Conclusion

Of all the elements of a long-distance move, getting your piano there in one functional piece may very well be the most challenging part. However, with proper planning, the right equipment, and some enthusiastic assistance, there is no reason that you cannot successfully move your piano and continue creating beautiful music in your new abode.

Of course, if all this sounds like a bit more than you would like to have a go at it on your own, professional long-distance movers have the experience, skills, and tools to guarantee a successful move.

The Kayaking Adventure

Kayaking is a fun and adventurous recreational sport enjoyed by hundreds of thousands of people every year. Whether you are paddling calmly around the local mill pond, or facing down the rapids DELIVERANCE style (no, wait, those were canoes) …either way, kayaking is an enjoyable pastime for the whole family. Many folks opt to own their own kayaks instead of renting them, and some kayakers will tell you they get pretty close to their chosen kayak in a way not unlike car enthusiasts gush over automobiles. So, when you find yourself having to move, it is inevitable that your beloved kayak is going to go with you. If you have never moved a boat before, this is how you do it!

            Planning, Planning, Planning

As with any project, proper planning will always result in a more efficient outcome. Waiting until the last minute, throwing your kayak on the roof of the car or truck and tying it down wherever the ropes go through the windows may sound good, but ultimately will fail in its execution.

            All Aboard!

Place the kayak atop whatever vehicle is carrying it, using cross straps to secure it to your racks. You can also attach the bow and stern lines but leave them somewhat slack until you are actually ready to go. Tightening them down too soon could actually warp the kayak itself, which would ultimately make for a none too pleasant journey later on!

Orange kayak on the grass beside a car, with straps ready for loading and securing

You also wish to use a cockpit cover, as this not only prevents foreign matter from getting into the seating area but can actually increase the aerodynamics (and fuel mileage) by preventing the kayak from scooping in the air as you go down the road. Some kayaks have even been known to fly off their transport vehicles if enough wind force is exerted upon them. These covers are very inexpensive and will provide safety and fuel efficiency when used properly.

            Front, Bow! Back, Stern!

When securing the kayak for transport, always use the bow and stern lines. This is designed to keep your kayak from shifting sideways and making its best impression of an airplane wing. Kayaks are hydrodynamically engineered, not much different from aerodynamics, as they are meant to move through the water efficiently. This can become a problem if the kayak is not properly secured, as a sudden stop could turn the kayak into an airborne missile. A person standing in the wrong place could get hurt. Use bow and stern lines of the ratchet variation for the most secure and dependable results.

            Check Those Lines

Once you are secured and on the road, periodically stop and check those lines to make sure they are still properly tightened down. Things have a habit of shifting or working loose during transport and just giving them a cursory check whenever you stop for food, gas, or bathroom breaks will help ensure that you do not have any surprises on the way to your new destination.

            Inspection!

Even if you aren’t facing a move, a periodic inspection of your tie down gear will make sure that they are always in proper working order and ready the next time you need to transport your kayak, either for a major move or just a trip to spend the day on the lake. As with any sport, you want to keep your equipment in top working condition.

            Take Your Time

We have already established that a kayak could become a formidable force if suddenly projected through the air. Do not be in such a hurry during your move. Driving slower makes it much less likely that you will have to stop quickly or make sudden turns or other maneuvers, any of which could serve to loosen the kayak from the top of your vehicle, making it susceptible to falling off. Any time you are powering a load, take it a little slower and be careful.

            Use A Caution Flag

In some place this may be the law, but it is always a good idea to affix a caution flag to your kayak, as it will no doubt hang pretty far over the front and back of your vehicle, and you do not want anyone getting close enough to risk a collision. Kayaks have very narrow profiles from front and rear, and may be difficult to see, but that red caution flag should be enough to catch anyone’s attention.

            Rule Number One – Obey All Rules

Some states may have other laws pertaining to the transport of kayaks, so always familiarize yourself with them and make sure you are in compliance. Many states require three points of contact between the kayak and the transport vehicle, so you might want to go that extra mile and have four. Just to be on the safe side.

            Of Course There Is Always the Old-Fashioned Way

If you are looking at a long-distance move, and do not want to have your baby riding piggyback for hundreds of miles, there remains the option of packing the kayak into your moving vehicle and transporting it that way. In fact, you may be able to utilize the cockpit area for additional smaller items.

Just make sure you afford enough room in your moving vehicle to accommodate the kayak and use enough ratchet straps to fully secure it to the wall or floor of the vehicle. The last thing you want is the kayak banging around in the back like a BB in a box car.

Of course, when you arrive at your destination, have some space designated for your kayak to occupy, somewhere that you can easily retrieve it when you are ready for some fun.

            Summary

Moving, even long-distance moves, do not have to be trying, nerve wracking experiences. With proper planning, they can be a fun and rewarding adventure. Perhaps not as adventurous as riding the rapids, but an enjoyable process, nonetheless. So, take the proper time and effort to make sure everything is done right, and enjoy your kayaking adventures in your new area of the country!

The Essential Guide To Moving A Gun Safe

Gun safes are invaluable residential and business items designed to store and protect firearms and ammo, as well as preventing accidental injury or even death. Many gun owners have made a gun safe a priority in their homes, having a wide variety of sizes to choose from to suit their own firearm needs.

Moving a gun safe to a new location can be a challenging task requiring a clear plan of action and attention to detail. Doing this the right way will help ensure the safety and security of you and your family. These are the best practices for gun safe transport.

Two men in gloves carefully moving a large gun safe on wheels, illustrating proper lifting and transport techniques.

Do Not Go It Alone

While it may be feasible to move a gun safe by yourself, it is not recommended. Gun safes are often heavy and quite cumbersome, weighing up to and beyond a thousand pounds, and moving such a heavy object can be dangerous if you are not experienced and properly equipped. Unless you have done this before and are in good physical condition, you should recruit some friends to assist or hire a professional moving company well versed in the handing of such items.

Do Gun Safes Move Easily?

This depends of course upon the size and weight of the gun safe being moved, not to mention the logistics of navigating hallways, steps, garages, fencing, etc. In addition, the weight distribution for the safe may be a problem, rendering it awkward to maneuver, maintain balance, and keeping control during the process. You need to be realistic about the size and weight of the gun safe as well as your own physical ability and experience.

Equipment Checklist

As with any move, it is necessary to assemble all of your materials beforehand. You do not want to get into the middle of a demanding situation only to discover you need something that you forgot. The tools required for proper care and feeding of a gun safe during a move are:

  • Dolly or hand truck. Again, depending on the size of the safe. These provide much needed maneuverability and stability.
  • Furniture sliders. These are places under the base or the individual feet of any safe or furniture item and allow them to be slid across the floor without undue stress or damage to the floor or unit.
  • Ratchet straps. Thes straps provide a secure connection to the dolly, providing additional security during transport.
  • Moving blankets/padding. Designed to protect furniture from scuffs, dents, or scratches during the move.
  • Wooden planking. Often used to craft ramps or bridges across uneven surfaces or up stairsteps.

Once you have assembled the tools needed to transport your gun safe, it is time to begin the process.

Yes, It Is Heavy

Gun safes come in a wide variety of shapes and sizes, depending on the capacity. Some of them are:

  • Small To Medium: 200-600 pounds, designed for moderate security and protection.
  • Large: 600-2000 pounds and are more heavy duty in design, offering enhanced security features.
  • High Capacity: These are designed for commercial use or gun collectors, may weigh several thousand pounds, with maximum storage capability and advanced security.

Knowing the weight ahead of time will help you to plan a proper and safe move.

Lifting The Safe.

Lifting any heavy item of furniture requires proper technique in order to prevent injury, and gun safes are no different. Bend at the knees, not your back, and lift with your legs, maintaining a firm grip on the gun safe. If this is more than one person can manage, do not push it. Hire a few friends to step in and help you. This minimizes and distributes the weight and lessens the risk of injury. Be sure to lift incrementally, a little at a time, so that everyone maintains control of the gun safe at all times during the move. If you or anyone in your moving party complains of pain or discomfort, gently put the gun safe down and move to plan B (discussed shortly).

Two workers wearing safety gear securing a heavy gun safe on a wheeled platform with straps, demonstrating safe relocation practices.

Up or Down?

It may seem a bit easier to lay a gun safe on its back during a move, but this is generally not suggested, as gun safes are meant to stand upright. Placing them on their sides or back can pose a few risks.

  1. Structural Integrity: Gun safes have reinforced walls and doors, as these provide a level of security for your firearms. When placed on their back or sides, the integrity of those walls is compromised.
  2. Locking Mechanism. Gun safes have complex moving parts in their locking mechanisms, and positioning the unit on its back could damage those parts, resulting in difficulty opening or closing the safe door, and as such making the safe less secure against break ins.
  3. Shifting. As with any container, contents may shift when that container is placed in a new position or orientation. You do not want to risk damage to your vital firearms.

No, keep the gun safe in an upright position at all points during your move to ensure proper integrity and the safety of the contents.

Moving The Gun Safe

Ideally you will need at least two people to move your gun safe (although you really can’t go wrong with three). It distributes the weight of the safe evenly, you have effective communication as the safe is being moved, and most of all, it is a much safer process, reducing risk of injury, and makes for a safer relocation project.

Moving It In

Once you have arrived at your new location, you should already have determined exactly where the gun safe is going to go. Choose a room that provides easy access, which allows you to reach your firearms rapidly if required, and try to pick a room that has an extra layer of security, such as a bedroom, a home office, or even a dedicated gun room. You do not want guns stored in any area where unauthorized individuals might gain access to them.

Summing It Up

The key to a successful gun safe move is caution and safety. By prioritizing those two things, you have a good chance of successfully moving your gun safe across town or even across the country free of incident. Take breaks when you need to, make sure you are using proper lifting posture, and communicate openly with your moving partner.

And always remember, the safety of your firearm collection and that of everyone involved in the move should be your top concern. Doing so can make for a solid, efficient, and rewarding move.

What Exactly Is A Vespa?

Vespa is widely known as a successful brand of Italian manufactured scooters and mopeds, evolving from a single model motor scooter that was first made popular in the mid 1940s, and recognized by their painted and pressed steel body combining a cowl enclosure around the engine to conceal dirt and grease, as well as a flat floor panel designed to protect the feet of riders and passengers, and a forward fairing to protect from wind, rain, bugs, and other road debris. 

Vespas continue to be popular and inexpensive transportation even today, especially in urban areas where automotive parking may be at a minimum, and older restored Vespas are popular on the automotive enthusiast circuit. They are popular across the United States and Canada, as well as Europe and Japan.

Can I Take My Vespa With Me When I Move?

Yes, Vespas are designed to be transportable, and this can be done easy with the proper planning and execution. If you are planning a move and want to take your Vespa with you, proper care should be taken to avoid any damage to the vehicle during the process.

What Is Involved In Transporting a Vespa?

The first step is to decide exactly how you wish to transport your Vespa. If the move is a relatively short distance, you may save time by simply driving it to its new home. Simple enough, problem solved. But if you are looking at moving from state to state or across the country, then you most likely have no time for such a road trip (no matter how much fun it might be!).

The good news is that Vespas will fit in nearly any type of transportation vehicle from a mini van to larger trucks. Pickup trucks will require an uncovered bed to accommodate the Vespa, while cargo vans are probably the single most convenient as they offer enclosure as well as more than adequate space.

Fully enclosed cargo trailers, ideally a 5’x8’ minimum, also offer reliable space and protection during these moves, and even open trailers can be uses as well. Just make sure you have the proper hitch installed and that your vehicle is rated for towing a trailer. Clearly, there are a number of options available for this job.

What Other Tools Or Materials Are Needed to Transport a Vespa?

You will also need a few additional materials to make sure the transport is a safe and efficient one:

  •  Secure some metal cam straps to tie down and secure the Vespa. Otherwise, the Vespa may shift during transport that can cause damage to the vehicle.
  • You will also need a bar harness with rubber cups to secure and support the handlebars over the course of the trip. You want as little movement and shifting as possible.
  • Wheel chocks are small wedges that are places under the wheels, again, ideally to prevent the Vespa from rolling forward or backward.
  • A loading ramp is needed as the Vespa is too heavy to safely remove from a truck or cargo van. Most trailers will already have a loading ramp installed or at the very least one that can be quickly attached and unattached. Make sure the ramp is metal or at least metal enforced to support the weight of the Vespa. If there is no ramp available, see if you can secure access to a loading dock, which will allow you to back straight up and be fairly level with the surface where the Vespa is and can be loaded in directly with no obstructions.
  • Finally, do not forget a tarp to place over the Vespa to protect it from any road debris or other hazards. Some folks insist on putting a tarp over their vehicle even if it is being transported in an enclosed trailer or van! It is all up to you.

How To Load and Secure a Vespa

Once you are ready, it is time to load the Vespa into your van or trailer. Have someone assist you during this part of the process. Resist the urge to drive the Vespa into or onto your trailer, as that can be dangerous and have results best described as “unfortunate.” Just wheel it up the ramp and into position, and do not forget to lower the kickstand when it is in position. Every little bit helps!

Next you should remove any accessories from the Vespa before securing it in place, as this will help avoid damage. Disconnect the power supply to avoid energy drainage, particularly if the Vespa is going to be stored for a while. Secure the handlebars using the bar harness, and then attach the bar harness to the cam straps. Cam straps should be fastened to the appropriate tow hitches located on either side of the van or trailer. These same hitches are also located in the railing of pickup truck beds.

Position the straps across the top of the Vespa, then tighten down as securely as possible with risking damage to the Vespa. You will have a pretty good idea when the bike is secured. Compress the suspension just enough that the bike does not easily move. The suspension will suffer no damage. If you are concerned about your Vespa’s paint and finish, have some old towels or t-shirts to place between the straps and the bike to avoid blemishes.

Finally, chock the wheels securely to prevent any forward or backward movement which may occur during transport. Now your Vespa is ready for the journey to its next destination.

How To Unload a Vespa At Your New Destination

Once you have arrived at your destination, it is time to unload the Vespa. Basically, you want to do everything in reverse. Remove the chocks from beneath the wheels. Then loosen and unhook the straps and the bar harness. When it is time to remove the Vespa from the cargo hold, secure some assistance from a friend or neighbor and have one person push the Vespa while the other helps support and guide the vehicle until it is off the trailer, down the ramp, and on firm ground. Trying to do it all yourself means you could very easily lose control of the Vespa and end up damaging it. Not exactly how you want to start this new chapter of your life!

In Conclusion

Moving your Vespa does not have to be a stressful endeavor. As with any project, large or small, proper planning prevents poor performance. Through judicious planning and careful execution, you should have no problem relocating your Vespa to your new home or office.

To pack fragile items safely, you'll need quality packing materials including bubble wrap, packing paper, and sturdy boxes with corrugated walls. Start by cleaning each item and wrapping them individually, using extra cushioning for delicate areas. Create a protective base layer in your box using 2-3 inches of bubble wrap or crumpled paper. Place items carefully, filling empty spaces with packing materials to prevent movement. Seal boxes thoroughly with heavy-duty tape along all seams, and clearly mark them as "Fragile." For valuable pieces, consider double-boxing with cushioning between containers. These essential steps will help protect your treasures, but there's much more to ensuring maximum protection during transport.

Essential Packing Materials

packing supplies for shipping

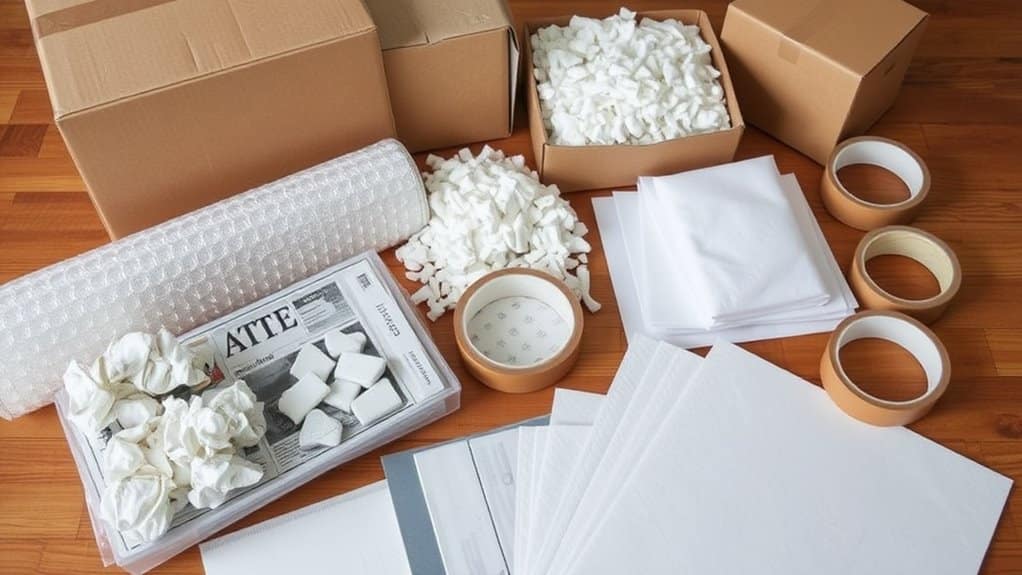
Success in packing fragile items starts with having the right materials on hand. Your material choices will greatly impact how well your items survive transport, so it's important to gather everything you'll need before starting the packing process.

You'll want to stock up on bubble wrap, packing paper, and foam sheets as your primary cushioning materials, which form the foundation of effective packing techniques. Experts recommend leaving at least two inches of cushioning around each item for optimal protection. Additionally, using medium/heavy duty boxes can enhance the durability of your packed items during transit.

For securing your items, you'll need strong packing tape, sturdy cardboard boxes, and proper dividers to keep things from shifting during transit.

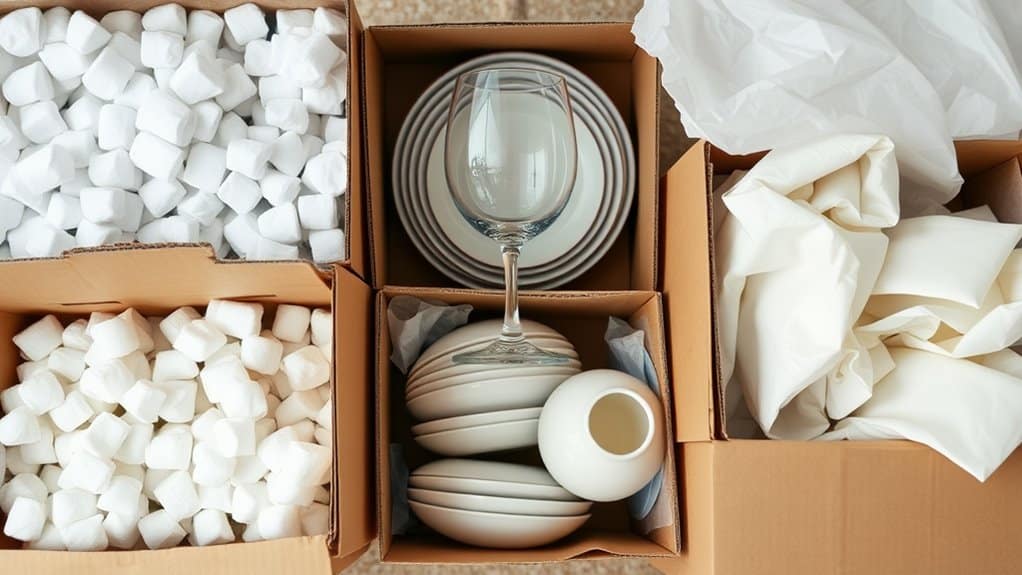
When it comes to filling empty spaces, you've got several options: biodegradable packing peanuts, shredded paper, or crumpled kraft paper will prevent items from moving around.

Don't forget to include foam corner protectors for items with sharp edges or delicate corners.

You'll also want to have scissors or a box cutter handy for precise cutting of materials.

For maximum protection, consider using double-boxing methods for extremely fragile items, and always keep "Fragile" labels ready to mark your packages.

Preparing Items Before Wrapping

Proper preparation is essential before wrapping your fragile items for transport.

Begin with fragile item classification, sorting your belongings based on their delicacy and specific packing requirements. You'll want to group similar items together, like placing all your dishes in one category and glassware in another, which helps you plan your packing strategy more effectively. Allocate sufficient time for careful organization and sorting of your items.

Before you start wrapping, verify you've completed all pre-wrapping cleaning tasks. Remove any dirt or debris that could scratch or damage your items during transit.

If you're dealing with items that have removable parts, take them apart and pack the components separately to prevent breakage. Don't forget to secure any loose pieces with tape and verify all container lids are tightly closed.

When you're ready to pack, start with your most delicate items first. You'll want to place heavier objects at the bottom of your boxes and layer lighter items on top.

Fill any empty spaces with packing paper or foam to prevent movement. Before sealing each box, give it a gentle shake to check for shifting, and clearly label it as "Fragile" with arrows indicating which side should face up.

Cushioning and Protection Methods

safety and impact absorption

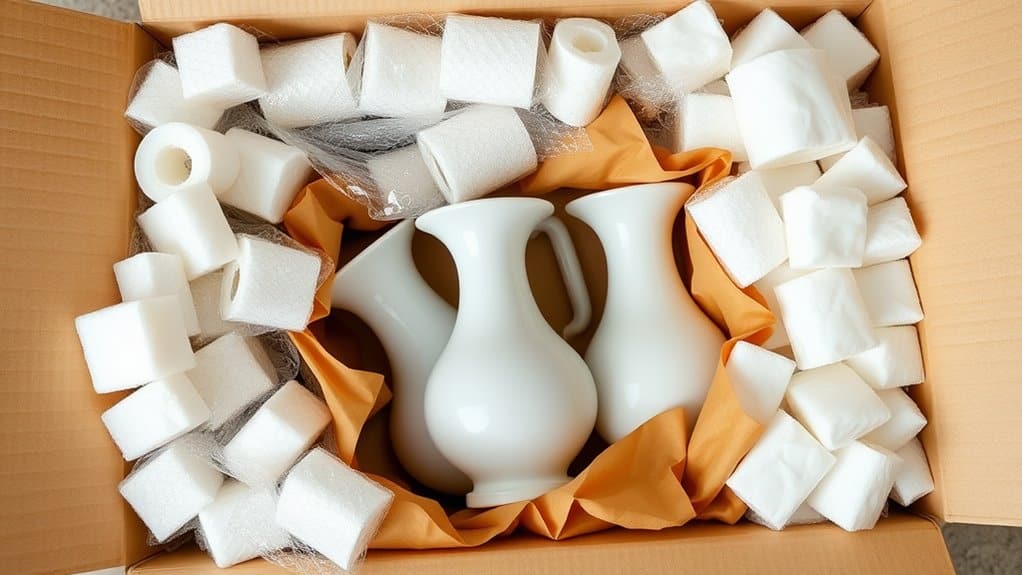
With your items sorted and cleaned, protecting them with the right cushioning materials becomes your next priority. Your packing strategies should start with creating a protective base layer of bubble wrap or crumpled packing paper, about 2-3 inches thick, at the bottom of your box. Air packaging solutions offer superior shock absorption while keeping package weight minimal.

When it comes to cushioning techniques, you'll want to wrap each item individually to prevent contact between pieces. Use bubble wrap for maximum protection, securing it with tape to keep the wrapping in place. For particularly delicate items, don't hesitate to double-wrap them for extra safety. Additionally, using high-quality packing tape ensures that your protective wrapping remains intact during transit.

Fill any empty spaces in your box with packing peanuts or air pillows to prevent movement during transport. If you're packing items with irregular shapes, use crumpled paper to create stable forms around them. For items with hollow spaces, stuff them with packing materials to provide internal support.

Remember to pay special attention to corners and edges, as they're particularly vulnerable to damage. You can use specialized corner protectors or add extra layers of cushioning material to these areas.

Before sealing your box, gently shake it to test for any shifting - if you hear movement, add more cushioning material.

Proper Box Selection

When you're packing fragile items, choosing the right box size is essential, as you'll want enough space for protective cushioning but not so much that items can shift during transit.

Your box should be sturdy and in excellent condition, with strong corners and thick, corrugated walls that can withstand the rigors of shipping and handling.

For especially valuable or breakable items, you'll want to take into account double-boxing, which involves placing a smaller, packed box inside a larger one with additional cushioning between them.

Size Matters Most

Selecting the right box size stands as your first line of defense in protecting fragile items during a move. When you're planning your packing strategies, remember that proper box dimensions directly impact how well your items survive transport.

You'll want to verify there's enough room for protective materials while avoiding excess space that could lead to shifting.

Here's what you need to evaluate when matching items to box sizes:

  1. Choose small boxes (1-1.5 cubic feet) for dense items like books or delicate pieces like champagne flutes, as they'll prevent too much movement.
  2. Select medium boxes (3 cubic feet) for lighter, bulkier items such as lampshades or small appliances.
  3. Opt for specialty boxes designed specifically for items like plates, mirrors, or artwork.
  4. Use double boxing for extremely valuable or fragile pieces, selecting an inner box with 2 inches of space for cushioning.

Remember that a properly sized box should leave about 2-3 inches of space around your item for protective materials.

You'll want to avoid boxes that are too large, as excess space can compromise the stability of your fragile items during transit.

Box Quality and Strength

Beyond choosing the right box size, the quality and strength of your packing materials can make or break your fragile items' safety during transport.

You'll want to select boxes made from high-quality corrugated cardboard that's specifically designed for shipping delicate items. Look for boxes with superior box durability, which you can identify through their burst strength or edge crush test ratings.

To guarantee structural integrity, choose boxes with three-layer construction and reinforced edges. You'll find that boxes with multiple layers and an outside liner provide the best protection against impacts during shipping.

Don't forget to examine the seams and corners, as these areas often need additional reinforcement with heavy-duty packing tape.

When you're preparing your box, make sure it can resist moisture and environmental conditions. Test the box's stacking strength, especially if you're shipping multiple packages.

Before sealing everything up, gently shake the box to check for movement, and fill any empty spaces with packing materials.

Finally, clearly label your package as "Fragile" or "Handle with Care" to alert handlers about the delicate contents inside.

Double-Boxing for Protection

Double-boxing provides the ultimate protection for your most delicate items during shipping. When you understand proper double boxing techniques, you'll greatly reduce the risk of damage during transit. The key is selecting the right combination of inner and outer boxes, with the outer box being 2-3 inches larger on all sides.

To maximize double boxing advantages, follow these essential steps:

  1. Choose a snug inner box that leaves only 1-2 inches of space around your wrapped item.
  2. Select an outer box that's 6 inches larger in all dimensions than the inner box.
  3. Pack your item in the inner box using bubble wrap or foam for cushioning.
  4. Place the sealed inner box in the center of the outer box, surrounded by 3 inches of packing material.

When you're filling the space between boxes, use high-quality packing materials like bubble wrap or packing peanuts. Make sure there's no movement when you gently shake the package.

Finally, seal your outer box using the H-taping method and clearly label it as "Fragile" on all sides. For valuable items, you'll want to take into account purchasing shipping insurance for added peace of mind.

Layer Organization Techniques

structured layer management methods

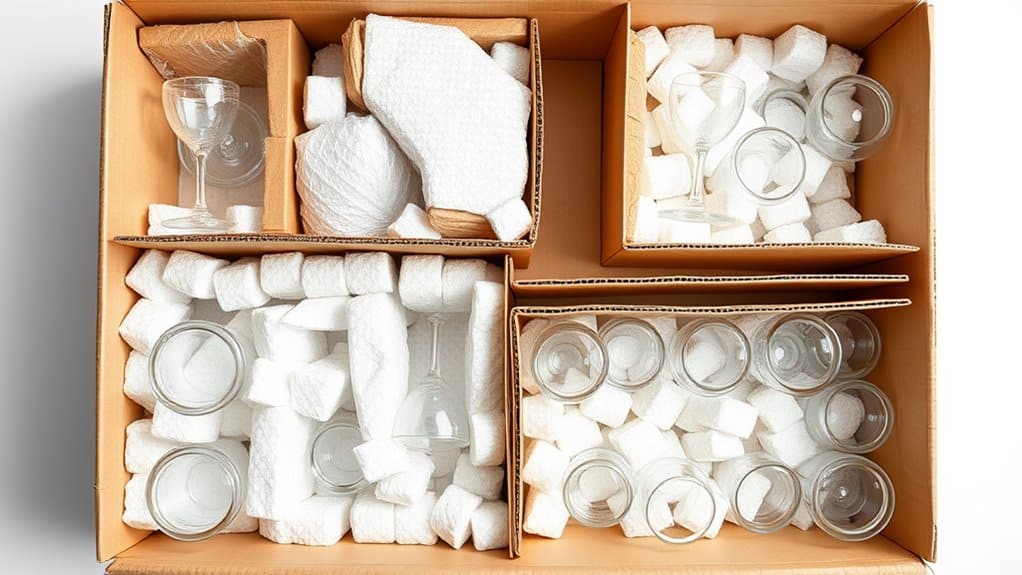
Proper layer organization forms the backbone of safely packing fragile items. When you're preparing your boxes, you'll need to follow specific layering techniques and packing sequences to guarantee maximum protection.

Start by reinforcing your box's bottom with extra tape and creating a cushioning foundation using packing peanuts or crumpled paper.

As you begin placing items, wrap each piece individually with bubble wrap or packing paper. Position heavier objects at the bottom, and stack plates vertically to reduce breaking risks.

You'll want to use dividers for glassware and fill hollow items with packing paper to prevent unwanted movement during transport.

Don't forget to fill empty spaces with packing materials as you go. Create stable levels using cardboard sheets or foam boards between layers of items.

When you're working with particularly delicate pieces, add multiple layers of bubble wrap and secure any protruding parts with extra padding.

Remember to avoid overpacking, as this can create pressure points that might damage your items. Instead, focus on creating even, well-supported layers that protect your fragile belongings throughout their journey.

Securing and Sealing Boxes

Securing and sealing your boxes correctly marks the final essential step in protecting fragile items during transit.

You'll want to start with selecting sturdy, corrugated cardboard boxes that feature multiwall construction and full overlap for maximum strength. When it comes to box closure techniques, always use heavy-duty packing tape that's at least 3 inches wide, applying it along all seams and corners.

Here are essential tape application tips to guarantee your items stay protected:

  1. Apply two strips of tape across the top and bottom seams, extending at least 4 inches down each side of the box.
  2. Reinforce all corners with additional tape strips for extra durability.
  3. Check that the tape makes complete contact with the box surface to prevent lifting.
  4. Double-tape any areas that might experience extra stress during handling.

For extremely valuable or delicate items, consider using the double-boxing method. Place your well-packed inner box inside a larger outer box, filling all empty spaces with cushioning materials like packing peanuts or air pillows.

Before finalizing the seal, gently shake the box to check for movement, adding more cushioning if needed.

Safe Transport Guidelines

secure travel protocols established

Once your boxes are properly sealed, the next phase involves guaranteeing their safe journey to their destination. When it comes to fragile item handling, you'll want to clearly label your boxes as "Fragile" or "Handle with Care" on all sides, making sure handlers know the contents require special attention.

Following packing best practices, you should indicate the correct upright position of your packages using directional arrows. Before transporting, give each box a gentle shake test to confirm that nothing's moving inside, and make any necessary adjustments to the cushioning materials.

If you're shipping particularly delicate items, consider using specialized fragile item shipping services for enhanced protection.

Don't forget to explore insurance options offered by your shipping carrier, especially for valuable or irreplaceable items.

When moving boxes yourself, always lift from the bottom, keep them level, and avoid stacking heavier items on top of lighter ones. If you're using a moving service, communicate clearly with the movers about which boxes contain fragile items, and guarantee they understand any specific handling requirements you've noted on the packaging.

Special Care for Antiques

When handling cherished antiques, you'll need to take extra precautions beyond standard packing methods. Start by gathering essential supplies like double-walled boxes, acid-free tissue paper, and bubble wrap to guarantee your unique antiques remain protected during transport.

Here are four essential packing tips for your valuable antiques:

  1. Clean each item gently before packing, removing dust and debris that could cause scratches during transit.
  2. Disassemble items when possible, wrapping each component separately in acid-free tissue paper.
  3. Use cardboard corner protectors on sharp edges, and create custom foam supports for oddly shaped pieces.
  4. Place silica gel packets in boxes to control humidity and prevent moisture damage.

For particularly delicate or valuable pieces, consider using custom crating with precisely cut foam inserts.

Always fill any empty spaces in boxes with packing peanuts to prevent movement, and clearly label each container with "Fragile" and directional arrows.

If you're dealing with especially valuable heirlooms, don't hesitate to seek expert assistance from professional movers who specialize in antique transport, as they'll have the experience and materials needed for safe handling.

Conclusion

When you've properly packed your fragile items using these methods, you'll greatly reduce the risk of damage during transport. Studies show that nearly 80% of shipping damage claims stem from inadequate packaging rather than mishandling. By taking the time to wrap, cushion, and secure your delicate possessions correctly, you're not just protecting valuable items - you're protecting precious memories and investments that often can't be replaced.

David Barroso
David Barroso
Jan 10, 2025

CA NY Express Movers and Eric Rummel, the account executive, provided exceptional assistance during my move. They ensured that I received the best price and that the entire process Read more testimonials

Katelyn R.
Katelyn R.
Jan 16, 2025

We used CA-NY Express last month to move from NYC to LA and had a great experience. We had never made a cross-country move before and didn't know what to expect, Read more testimonials

Daniel Zaltsman
Daniel Zaltsman
Mar 17, 2025

Second time using them for a cross-country move, and would use them the third time too. Solid, communicative, fairly priced. Thanks to the whole team! Read more testimonials

Back to top